
The OVA (Open Virtualization Archive) format has become an essential standard for distributing and deploying virtual machines quickly, securely, and across multiple platforms. We explore in depth how it works, its internal structure, and why system administrators, developers, and software vendors worldwide use it.
In a world where virtualization is a fundamental part of almost any technological infrastructure—from test laboratories to enterprise clouds—having universal formats for packaging and distributing virtual machines is more necessary than ever. This is where the OVA (Open Virtualization Archive) format comes into play, a practical, efficient, and widely compatible solution that has revolutionized the way virtual appliances are distributed.
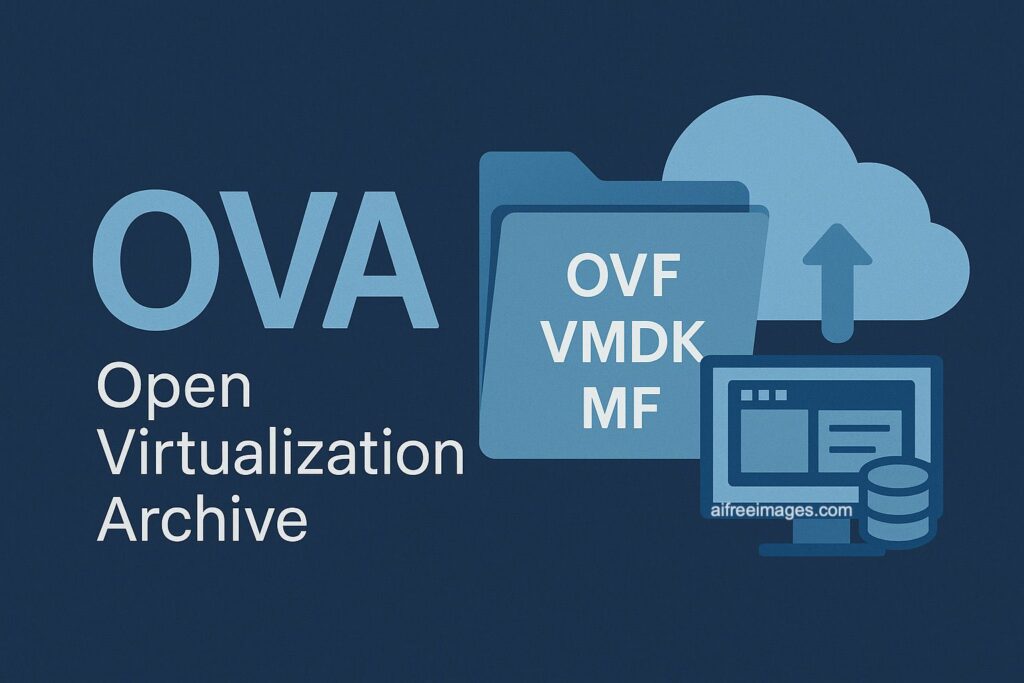
🧩 What is an OVA?
An OVA file is a container that packages a complete virtual appliance: that is, a virtual machine already configured with its operating system, applications, and settings ready to be executed on a compatible hypervisor. Its objective is to simplify the deployment and portability of virtual environments, eliminating the complexity of manual configurations.
Technically, an OVA is a compressed file in TAR (Tape Archive) format that includes several essential components:
Internal structure of an OVA
.ovffile (Open Virtualization Format): The heart of the package, contains the XML description of the complete VM configuration- One or several virtual disk files: Can be
.vmdk(VMware),.vhd(Hyper-V),.img(raw format), or.qcow2(QEMU) .mffile (Manifest): Contains SHA1/SHA256 checksums to validate the integrity of all files.certfile (optional): X.509 digital certificate to verify authenticity and distributor signature
In essence: An OVA is like a “sealed box” that contains everything necessary to run a virtual machine in a matter of minutes, guaranteeing integrity and authenticity.
📋 Anatomy of the OVF file: The XML that controls everything
The .ovf file is an XML document that follows the DMTF (Distributed Management Task Force) standard and constitutes the “instruction manual” of the virtual machine. Every technical aspect of the virtualized environment is defined here.
Basic structure of OVF XML
<?xml version="1.0" encoding="UTF-8"?>
<Envelope xmlns="http://schemas.dmtf.org/ovf/envelope/1"
          xmlns:ovf="http://schemas.dmtf.org/ovf/envelope/1"
          xmlns:vssd="http://schemas.dmtf.org/wbem/wscim/1/cim-schema/2/CIM_VirtualSystemSettingData"
          xmlns:rasd="http://schemas.dmtf.org/wbem/wscim/1/cim-schema/2/CIM_ResourceAllocationSettingData">

  <!-- File references -->
  <References>
    <File ovf:id="file1" ovf:href="disk1.vmdk" ovf:size="2147483648"/>
    <File ovf:id="file2" ovf:href="disk2.vmdk" ovf:size="1073741824"/>
  </References>

  <!-- Network configuration -->
  <NetworkSection>
    <Info>Virtual network for the appliance</Info>
    <Network ovf:name="VM Network">
      <Description>Default network</Description>
    </Network>
  </NetworkSection>

  <!-- Virtual disk description -->
  <DiskSection>
    <Info>Virtual disks used</Info>
    <Disk ovf:diskId="vmdisk1"
          ovf:fileRef="file1"
          ovf:capacity="20971520"
          ovf:format="http://www.vmware.com/interfaces/specifications/vmdk.html#streamOptimized"/>
    <Disk ovf:diskId="vmdisk2"
          ovf:fileRef="file2"
          ovf:capacity="10485760"
          ovf:format="http://www.vmware.com/interfaces/specifications/vmdk.html#streamOptimized"/>
  </DiskSection>

  <!-- Virtual system -->
  <VirtualSystem ovf:id="WebServer-01">
    <Info>Linux web server with Apache</Info>

    <!-- System configuration -->
    <VirtualHardwareSection>
      <Info>Virtual hardware configuration</Info>

      <!-- CPU -->
      <Item>
        <rasd:AllocationUnits>hertz * 10^6</rasd:AllocationUnits>
        <rasd:Description>Number of virtual CPUs</rasd:Description>
        <rasd:ElementName>2 virtual CPU(s)</rasd:ElementName>
        <rasd:InstanceID>1</rasd:InstanceID>
        <rasd:ResourceType>3</rasd:ResourceType>
        <rasd:VirtualQuantity>2</rasd:VirtualQuantity>
      </Item>

      <!-- RAM Memory -->
      <Item>
        <rasd:AllocationUnits>byte * 2^20</rasd:AllocationUnits>
        <rasd:Description>Memory</rasd:Description>
        <rasd:ElementName>2048MB of memory</rasd:ElementName>
        <rasd:InstanceID>2</rasd:InstanceID>
        <rasd:ResourceType>4</rasd:ResourceType>
        <rasd:VirtualQuantity>2048</rasd:VirtualQuantity>
      </Item>

      <!-- SCSI Controller -->
      <Item>
        <rasd:Address>0</rasd:Address>
        <rasd:Description>SCSI Controller</rasd:Description>
        <rasd:ElementName>SCSI Controller 0</rasd:ElementName>
        <rasd:InstanceID>3</rasd:InstanceID>
        <rasd:ResourceSubType>lsilogic</rasd:ResourceSubType>
        <rasd:ResourceType>6</rasd:ResourceType>
      </Item>

      <!-- Hard disk -->
      <Item>
        <rasd:AddressOnParent>0</rasd:AddressOnParent>
        <rasd:ElementName>Hard disk 1</rasd:ElementName>
        <rasd:HostResource>ovf:/disk/vmdisk1</rasd:HostResource>
        <rasd:InstanceID>4</rasd:InstanceID>
        <rasd:Parent>3</rasd:Parent>
        <rasd:ResourceType>17</rasd:ResourceType>
      </Item>

      <!-- Network interface -->
      <Item>
        <rasd:AddressOnParent>7</rasd:AddressOnParent>
        <rasd:AutomaticAllocation>true</rasd:AutomaticAllocation>
        <rasd:Connection>VM Network</rasd:Connection>
        <rasd:Description>VirtIO Network Card</rasd:Description>
        <rasd:ElementName>Ethernet adapter on "VM Network"</rasd:ElementName>
        <rasd:InstanceID>5</rasd:InstanceID>
        <rasd:ResourceSubType>VirtIO</rasd:ResourceSubType>
        <rasd:ResourceType>10</rasd:ResourceType>
      </Item>
    </VirtualHardwareSection>

    <!-- Operating system configuration -->
    <OperatingSystemSection ovf:id="36">
      <Info>Guest Operating System</Info>
      <Description>Ubuntu Linux (64-bit)</Description>
    </OperatingSystemSection>

    <!-- Customizable properties -->
    <ProductSection>
      <Info>Product configuration</Info>
      <Product>Apache Web Server Appliance</Product>
      <Vendor>My Company</Vendor>
      <Version>2.4.1</Version>

      <Property ovf:key="hostname" ovf:type="string" ovf:value="webserver">
        <Description>Server hostname</Description>
      </Property>

      <Property ovf:key="admin_password" ovf:type="password" ovf:value="">
        <Description>Administrator password</Description>
      </Property>

      <Property ovf:key="enable_ssl" ovf:type="boolean" ovf:value="true">
        <Description>Enable SSL</Description>
      </Property>
    </ProductSection>
  </VirtualSystem>
</Envelope>
Code language: HTML, XML (xml)
Key OVF XML elements explained
1. Envelope: The root container that defines XML namespaces and encapsulates all configuration.
2. References: Lists all external files (disks, ISOs) with their unique identifiers, paths, and sizes.
3. NetworkSection: Defines virtual networks available for the virtual machine.
4. DiskSection: Specifies virtual disks, their formats, capacities, and references to physical files.
5. VirtualSystem: Contains the complete configuration of a specific virtual machine.
6. VirtualHardwareSection: Defines assigned virtual hardware:
- ResourceType 3: CPU
- ResourceType 4: RAM Memory
- ResourceType 6: SCSI Controller
- ResourceType 10: Network Card
- ResourceType 17: Hard Disk
7. OperatingSystemSection: Identifies the guest operating system with standard CIM codes.
8. ProductSection: Allows defining configurable properties that users can customize during import.
🧪 Advanced use cases of the OVA format
Enterprise distribution
- Security appliances: Virtual firewalls (pfSense, Sophos XG)
- Backup solutions: Veeam, Acronis virtual appliances
- Monitoring platforms: Nagios, Zabbix, PRTG
- Pre-configured databases: Oracle VM Templates, SQL Server appliances
Development and testing environments
- Cybersecurity labs: Kali Linux, Parrot Security OS
- Development environments: Pre-configured LAMP/LEMP stacks
- Learning platforms: Vulnerable machines for penetration testing
- Product demos: Trial versions of enterprise software
Migration and disaster recovery
- Critical system backup: Exportable snapshots
- Inter-hypervisor migration: Physical to virtual (P2V)
- Environment replication: Development → Testing → Production
📦 OVA vs OVF vs other formats: Technical comparison
| Format | Type | Advantages | Disadvantages | Use cases |
|---|---|---|---|---|
| OVA | Single TAR file | Maximum portability, guaranteed integrity | Large size, less flexible | Distribution, complete backup |
| OVF | Separate files | Flexibility, easy modification | Multiple files, less portable | Development, customization |
| VMDK | VMware disk | Optimized performance, snapshots | VMware proprietary | Pure VMware environments |
| VHD/VHDX | Microsoft disk | Native Hyper-V integration | Limited to Microsoft ecosystem | Windows/Hyper-V environments |
| QCOW2 | QEMU disk | Efficient compression, snapshots | Mainly Linux/KVM | Open source clouds, KVM |
🔄 Extended compatibility and conversions
Native support
- VMware vSphere/ESXi: Full support, direct import
- Oracle VirtualBox: 100% compatible, GUI and CLI interface
- Citrix XenServer: Limited support, requires XenConvert
- Proxmox VE: Import via
qm importovf
Require conversion
# Hyper-V (OVA → VHDX)
qemu-img convert -f vmdk -O vhdx disk.vmdk disk.vhdx

# KVM/QEMU (OVA → QCOW2)
qemu-img convert -f vmdk -O qcow2 disk.vmdk disk.qcow2

# AWS EC2 (VMDK → AMI)
aws ec2 import-image --disk-containers file://containers.json
Code language: PHP (php)
🛠️ Advanced tools for working with OVA
Creation and manipulation
# Extract OVA content
tar -tf appliance.ova                    # List content
tar -xf appliance.ova                    # Extract files

# Create OVA from OVF files
tar -cf new.ova file.ovf disk.vmdk file.mf

# Validate integrity with OpenSSL
openssl sha1 *.vmdk *.ovf > file.mf      # Generate checksums
Code language: CSS (css)
Automation with PowerCLI (VMware)
# Import OVA with custom configuration
$ovfConfig = Get-OvfConfiguration -Ovf "appliance.ova"
$ovfConfig.NetworkMapping.VM_Network.Value = "Production-VLAN"
$ovfConfig.Common.hostname.Value = "prod-webserver"
Import-VApp -Source "appliance.ova" -OvfConfiguration $ovfConfig
Code language: PHP (php)
🔐 Security and integrity verification
Checksum verification
The .mf file contains SHA1 or SHA256 hashes of all components:
SHA1(appliance.ovf)= a1b2c3d4e5f6789...
SHA1(disk1.vmdk)= f6e5d4c3b2a1987...
SHA1(disk2.vmdk)= 9876543210abcdef...
Digital certificates
.cert files allow verification of:
- Authenticity: The OVA comes from the legitimate distributor
- Integrity: Has not been modified since signing
- Non-repudiation: Cryptographic guarantee of origin
# Verify certificate
openssl x509 -in appliance.cert -text -noout
Code language: CSS (css)
🚀 Technical advantages of the OVA format
✅ Atomicity: Single file, single transfer ✅ Cryptographic integrity: Automatic checksums of all components
✅ Rich metadata: Complete description in standard XML ✅ Versioning: Support for multiple OVF specification versions ✅ Customization: Configurable properties without modifying disks ✅ Smart compression: TAR allows additional compression (gzip, bzip2) ✅ Traceability: Vendor, product, and version information embedded
⚠️ Limitations and technical considerations
❌ File size: Can exceed 100GB for complex appliances ❌ Hypervisor dependencies: Some ResourceTypes are not universal ❌ Network limitations: Complex network configurations may be lost ❌ Licensing: Does not solve licensing issues for included software ❌ Format versioning: OVF 1.0 vs 2.0 vs 2.1 may have incompatibilities ❌ Specific hardware: CPU/extension dependencies can cause problems
🔮 Evolution and future trends
OVF 2.1 and new features
- Container support: Integration with Docker/Podman
- Cloud-init configuration: Post-deployment automation
- Modern hardware: Support for virtual GPU, NVMe, SR-IOV
- Software-defined networks: Integration with OpenStack, VMware NSX
Emerging alternatives
- HashiCorp Packer: Image creation automation
- Cloud-init + Terraform: Declarative deployment
- Kubernetes operators: For container-native applications
- Image Builder: CI/CD tools for appliances
Hybrid use cases
# Example: Terraform + OVA
resource "vsphere_virtual_machine" "appliance" {
  name     = "imported-appliance"
  ovf_deploy {
    ovf_network_map = {
      "VM Network" = data.vsphere_network.network.id
    }
    remote_ovf_url = "https://releases.company.com/appliance-v2.1.ova"
  }
}
Code language: PHP (php)
🧾 Technical conclusion
The OVA format represents the natural evolution of virtual appliance distribution, combining the simplicity of a single file with the descriptive richness of the OVF XML standard. Its metadata-based architecture allows not only transporting virtual machines but also automating their deployment and customization at enterprise scale.
For system architects, DevOps, and virtualization administrators, understanding the internal structure of OVA—especially the OVF XML—is crucial to fully leverage its automation capabilities, integrity verification, and advanced customization.
In an ecosystem where infrastructure as code and reproducible deployments are the norm, the OVA format will continue to be a fundamental piece of the modern virtualization puzzle, especially in hybrid environments that combine public clouds, private clouds, and on-premise systems.
Additional resources: